用.Net Core的方式打开数据库课程设计
准备工作
- Visual Studio 2019 Community
- 安装了.NET桌面开发组件

新建项目
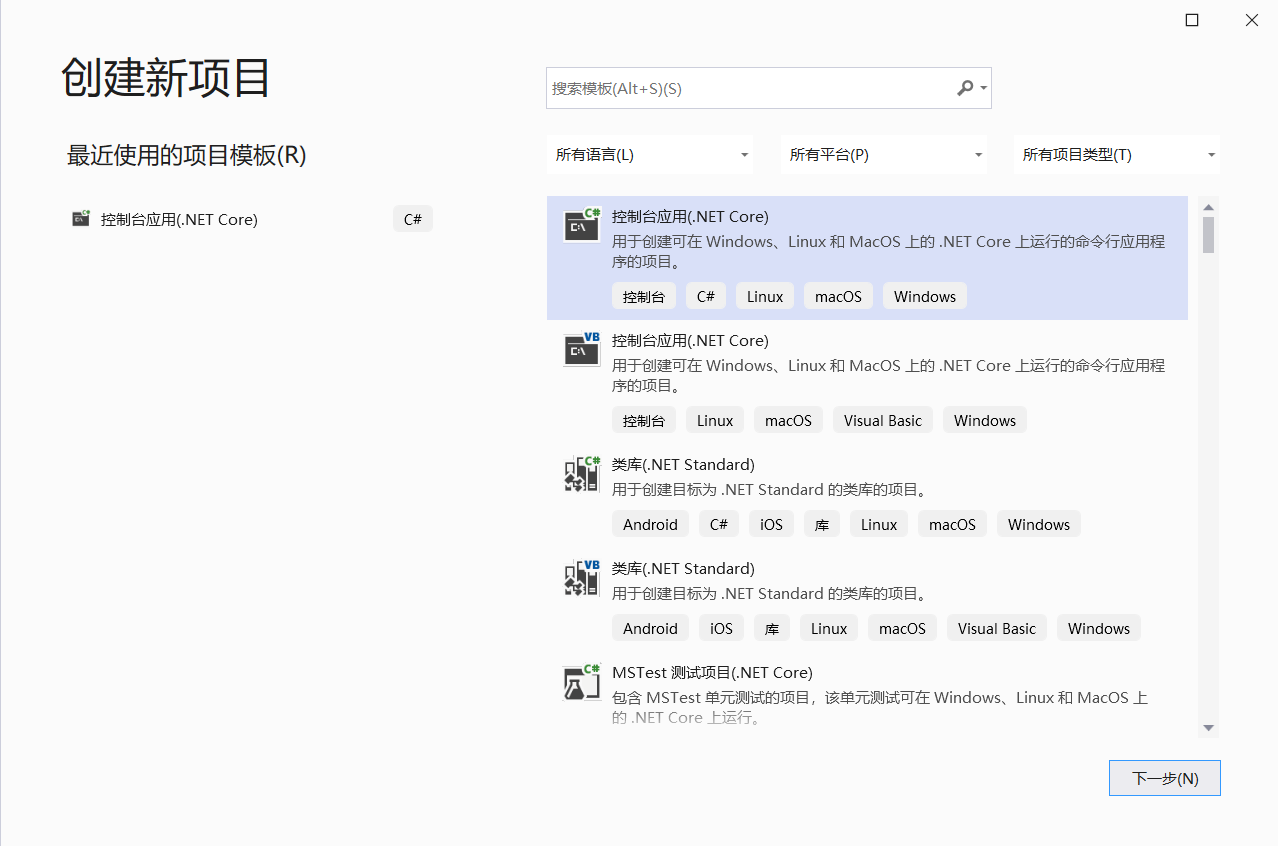
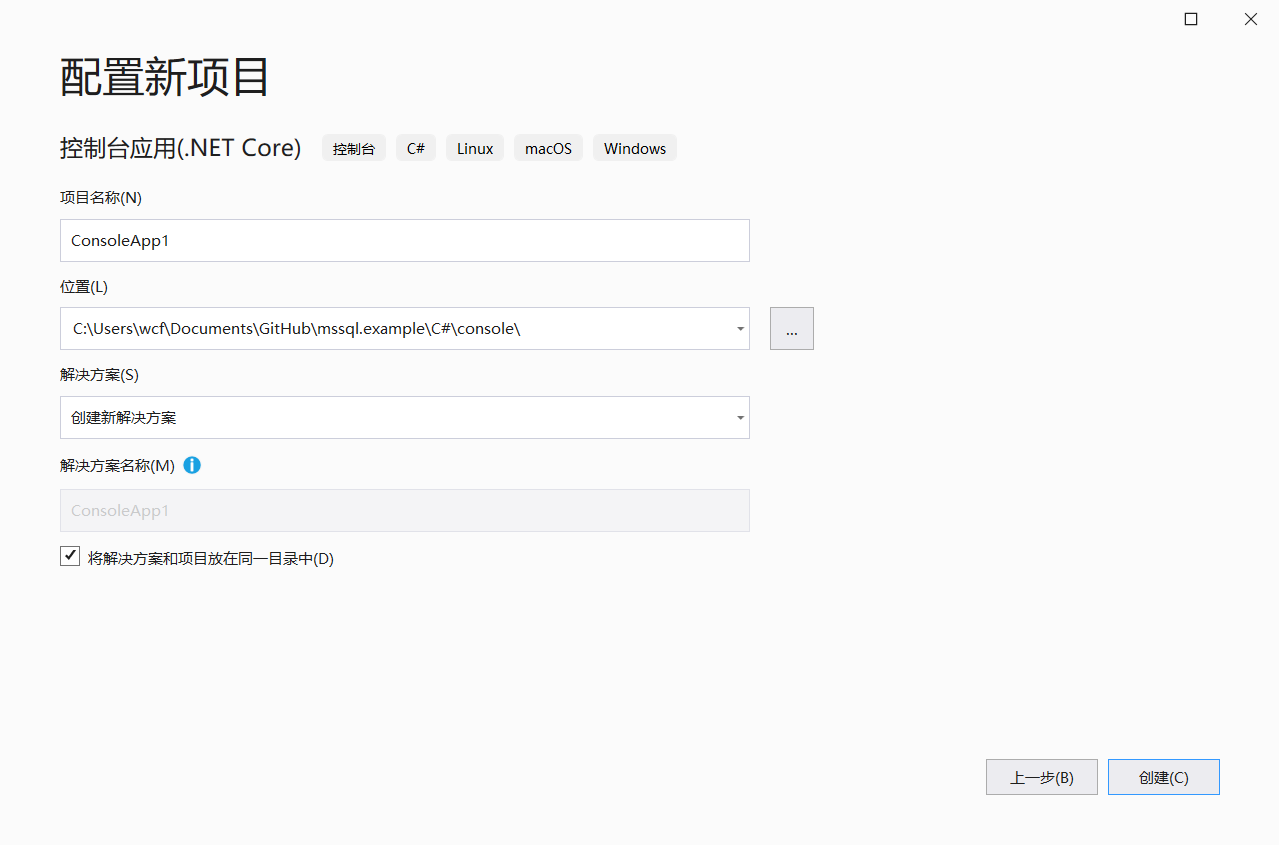
打开Visual Studio点击新建项目,选择你要创建项目的类型(控制台应用、WinForm、WPF)并给项目起个名字
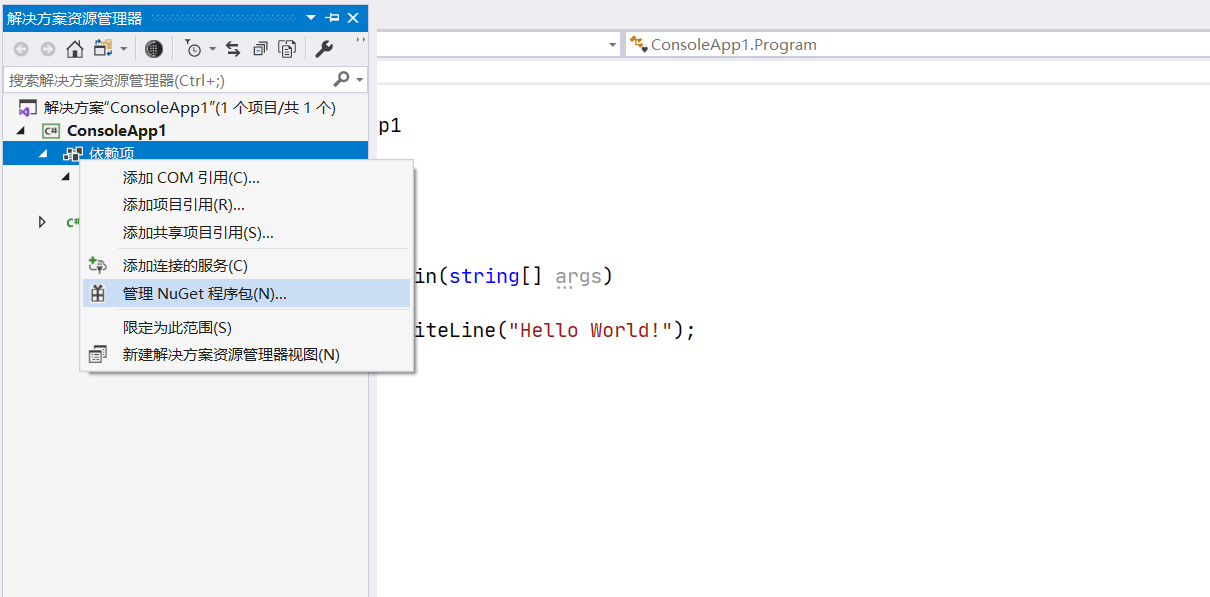
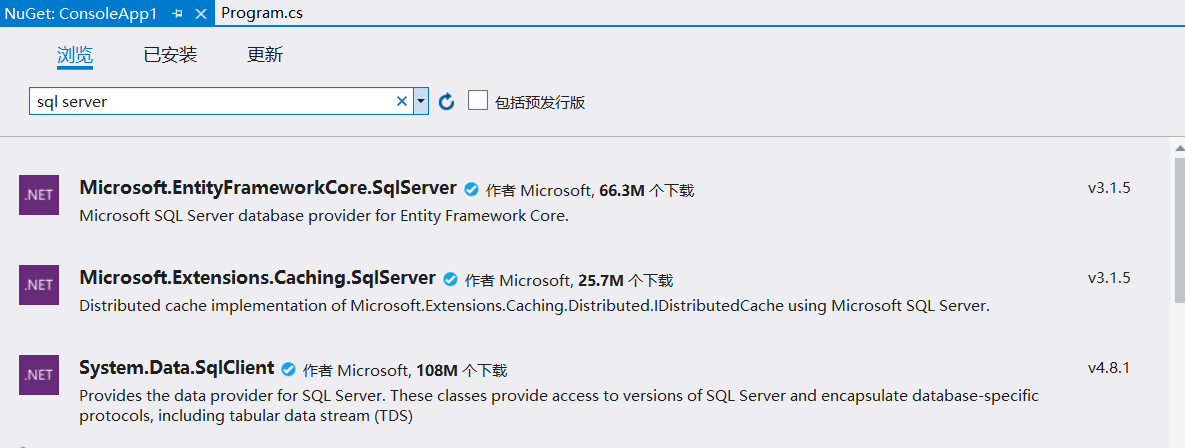
添加依赖
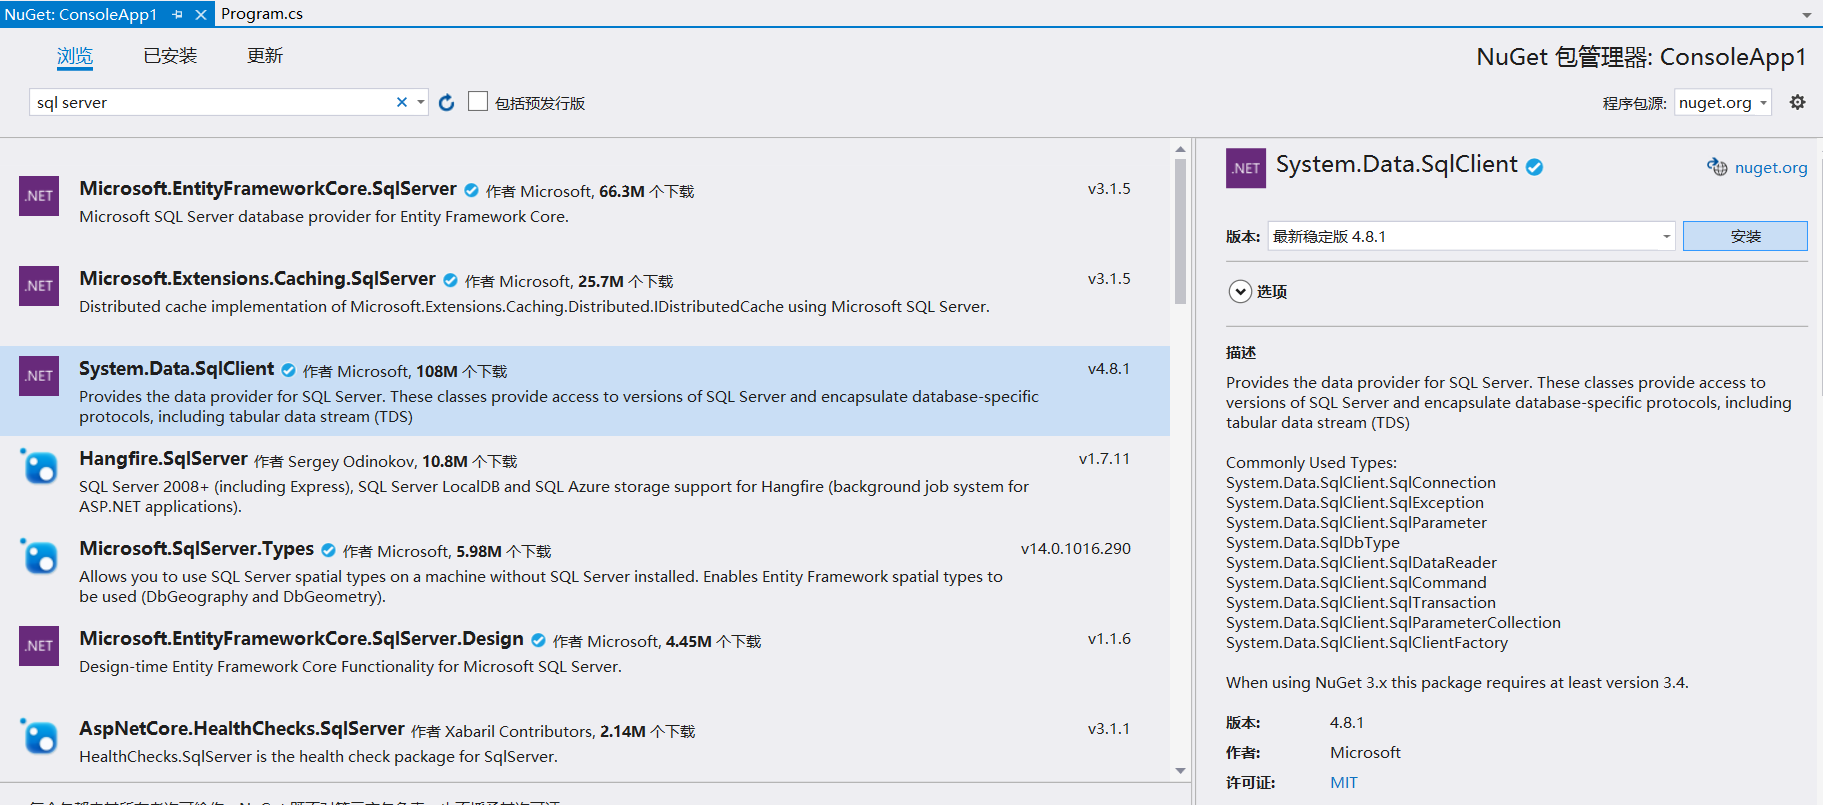
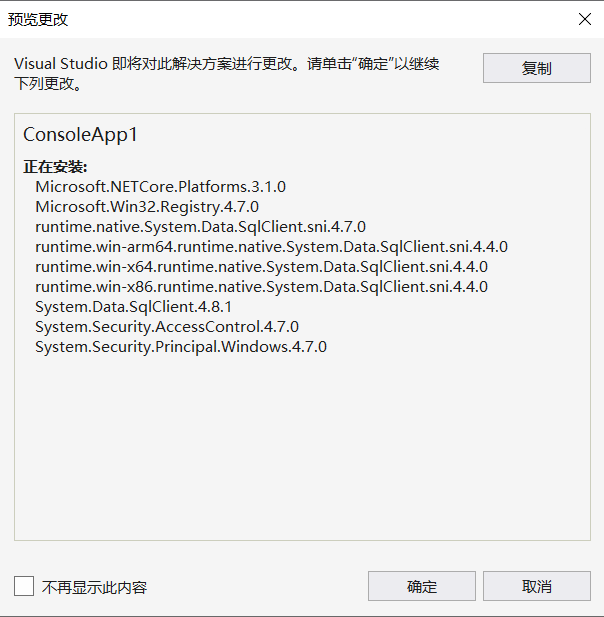
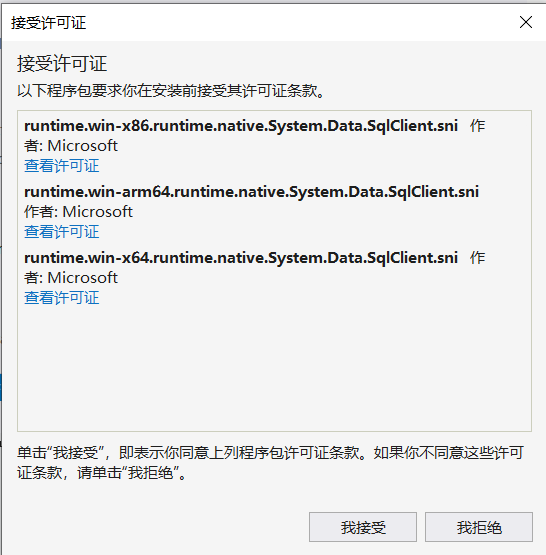
在依赖项右键点击管理NuGet程序包,搜索'sql server',选择System.Data.SqlClient并安装,中途跳出的提示框点击确定,许可证点击接受即可
数据库准备
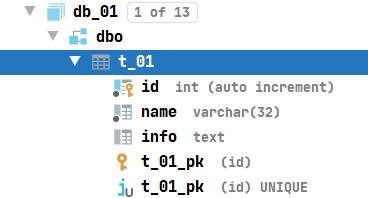
create database db_01;

use database db_01;

create table t_01
(
    id   int identity constraint t_01_pk primary key nonclustered,
    name varchar(32) not null,
    info text
);
初始数据
用代码连接数据库
新建Connection.cs工具类用于提供SQL连接对象,可以通过Connection.GetConnection()调用,代码如下
public static SqlConnection GetConnection()
{
try
{
//构建连接字符串
SqlConnectionStringBuilder builder = new SqlConnectionStringBuilder();
builder.DataSource = "数据库地址localhost或ip";
builder.UserID = "sa";
builder.Password = "你的密码";
builder.InitialCatalog = "目标数据库";
//根据SqlConnectionStringBuilder参数创建连接字符串
SqlConnection connection = new SqlConnection(builder.ConnectionString);
connection.Open();
return connection;
}
catch (SqlException e)
{
Console.WriteLine(e.ToString());
return null;
}
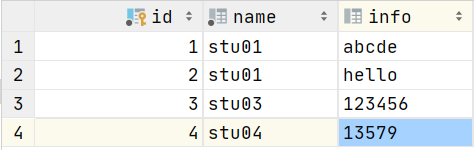
}查询数据
查询id=2的记录
//查询t_01中id=2的记录
using (SqlCommand command = connection.CreateCommand())
{
    //@id为占位符,用command.Parameters.AddWithValue("@id", 2)赋值
    //即最后得到的SQL语句为'select * from t_01 where id=2'
    command.CommandText = "select * from t_01 where id=@id";
    command.Parameters.AddWithValue("@id", 2);
    //获取SqlDataReader对象来读取数据
    using (SqlDataReader reader = command.ExecuteReader())
    {
        //while循环内每次读一行,用reader["id"]读取改行id的值
        while (reader.Read())
        {
            Console.WriteLine(reader["id"]);
            Console.WriteLine(reader["name"]);
            Console.WriteLine(reader["info"]);
        }
    }
}
查询结果
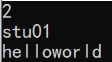
更新数据
将id=2的记录的info字段修改为helloworld
using (SqlCommand command = connection.CreateCommand())
{
    //将id为2的记录的info字段改为helloworld,
    command.CommandText = "update t_01 set info=@info where id=@id";
    command.Parameters.AddWithValue("@info", "helloworld");
    command.Parameters.AddWithValue("@id", 2);
    //affectedRows保存受影响的行数
    int affectedRows = command.ExecuteNonQuery();
    Console.WriteLine(affectedRows);
}
更新结果
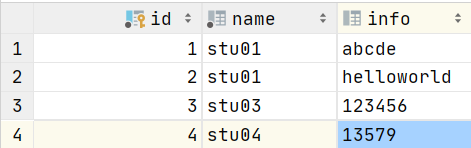
插入数据
using (SqlCommand command = connection.CreateCommand())
{
    command.CommandType = CommandType.Text;
    command.CommandText = "insert into t_01 (name, info) values (@name, @info)";
    command.Parameters.AddWithValue("@name", "stu05");
    command.Parameters.AddWithValue("@info", "135790");
    int affectedRows = command.ExecuteNonQuery();
    Console.WriteLine(affectedRows);
}
插入结果
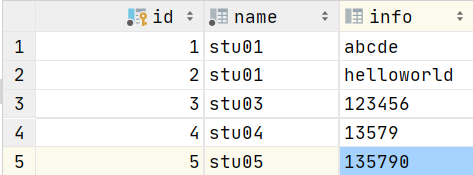
删除数据
删除id=8的记录
using (SqlCommand command = connection.CreateCommand())
{
    command.CommandType = CommandType.Text;
    command.CommandText = "delete from t_01 where id=@id";
    command.Parameters.AddWithValue("@id", 8);
    int affectedRows = command.ExecuteNonQuery();
    Console.WriteLine(affectedRows);
}
删除结果

WordPress提供了很方便的CSS编辑器,可以为你的页面添加样式。
打开你的主题,进入“自定义CSS”,输入
html {
    filter: progid:DXImageTransform.Microsoft.BasicImage(grayscale=1);
    -webkit-filter: grayscale(100%);
}
即可让你的页面变成灰色
悼念逝者,致敬英雄
准备工作
- IDEA 2019.3.4
- JDK 7及以上版本
- Tomcat 7及以上版本
Tomcat
官网下载Tomcat

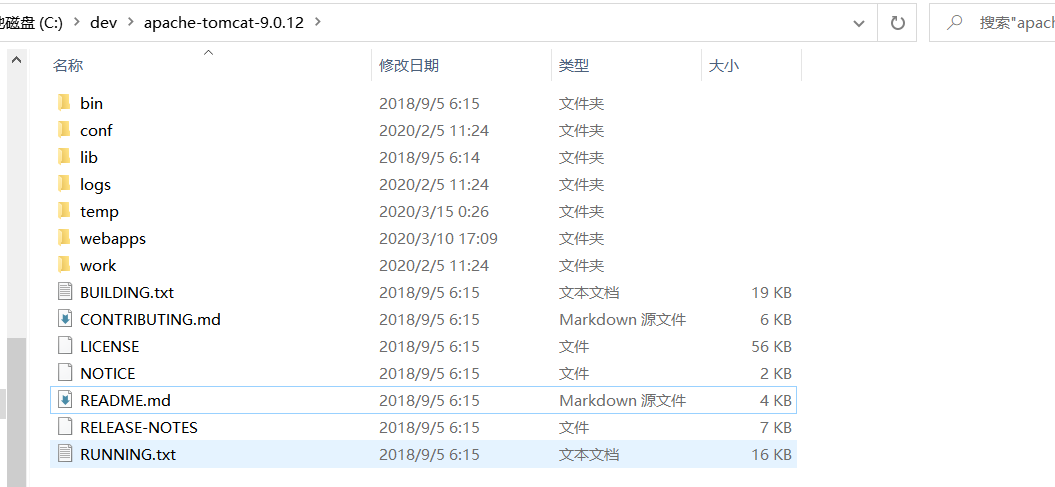
解压或安装到一个目录(最好不含空格或中文的路径)
我们可以用bin/catalina.bat 或 bin/catalina.sh来开关Tomcat
# 开启
PS C:\dev\apache-tomcat-9.0.12\bin> .\catalina.bat start
Using CATALINA_BASE:   "C:\dev\apache-tomcat-9.0.12"
Using CATALINA_HOME:   "C:\dev\apache-tomcat-9.0.12"
Using CATALINA_TMPDIR: "C:\dev\apache-tomcat-9.0.12\temp"
Using JRE_HOME:        "C:\Program Files\Java\jdk1.8.0_131"
Using CLASSPATH:       "C:\dev\apache-tomcat-9.0.12\bin\bootstrap.jar;C:\dev\apache-tomcat-9.0.12\bin\tomcat-juli.jar"

# 关闭
PS C:\dev\apache-tomcat-9.0.12\bin> .\catalina.bat stop
Using CATALINA_BASE:   "C:\dev\apache-tomcat-9.0.12"
Using CATALINA_HOME:   "C:\dev\apache-tomcat-9.0.12"
Using CATALINA_TMPDIR: "C:\dev\apache-tomcat-9.0.12\temp"
Using JRE_HOME:        "C:\Program Files\Java\jdk1.8.0_131"
Using CLASSPATH:       "C:\dev\apache-tomcat-9.0.12\bin\bootstrap.jar;C:\dev\apache-tomcat-9.0.12\bin\tomcat-juli.jar"
我们可以看见Tomcat下有webapps目录,我们写的应用可以部署在这里
使用IDEA提高开发效率
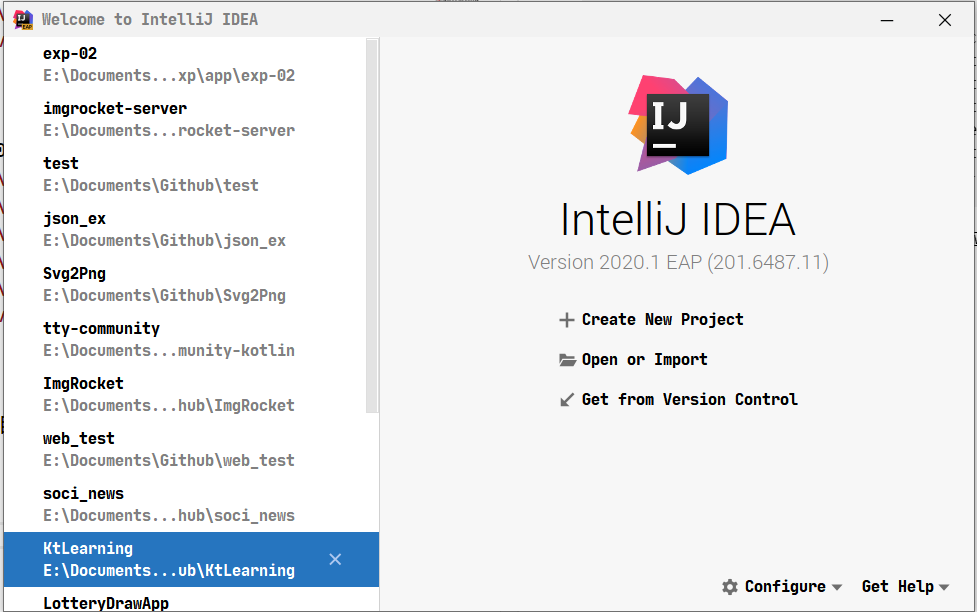
打开IDEA我们可以看见下面的起始页面
点击Create New Project新建项目
进入Java Enterprice选择Web Application

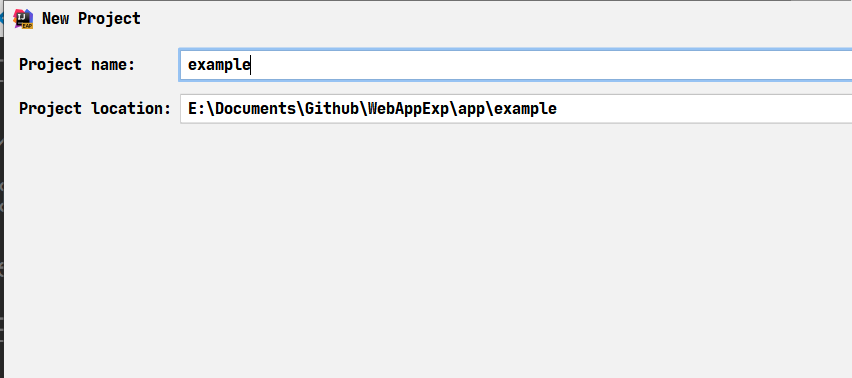
输入项目名称和路径
新建项目完毕

到这一步我们就完成了项目的创建,接下来是部署和运行项目的环节
点击右上角的Add Configuration新增配置

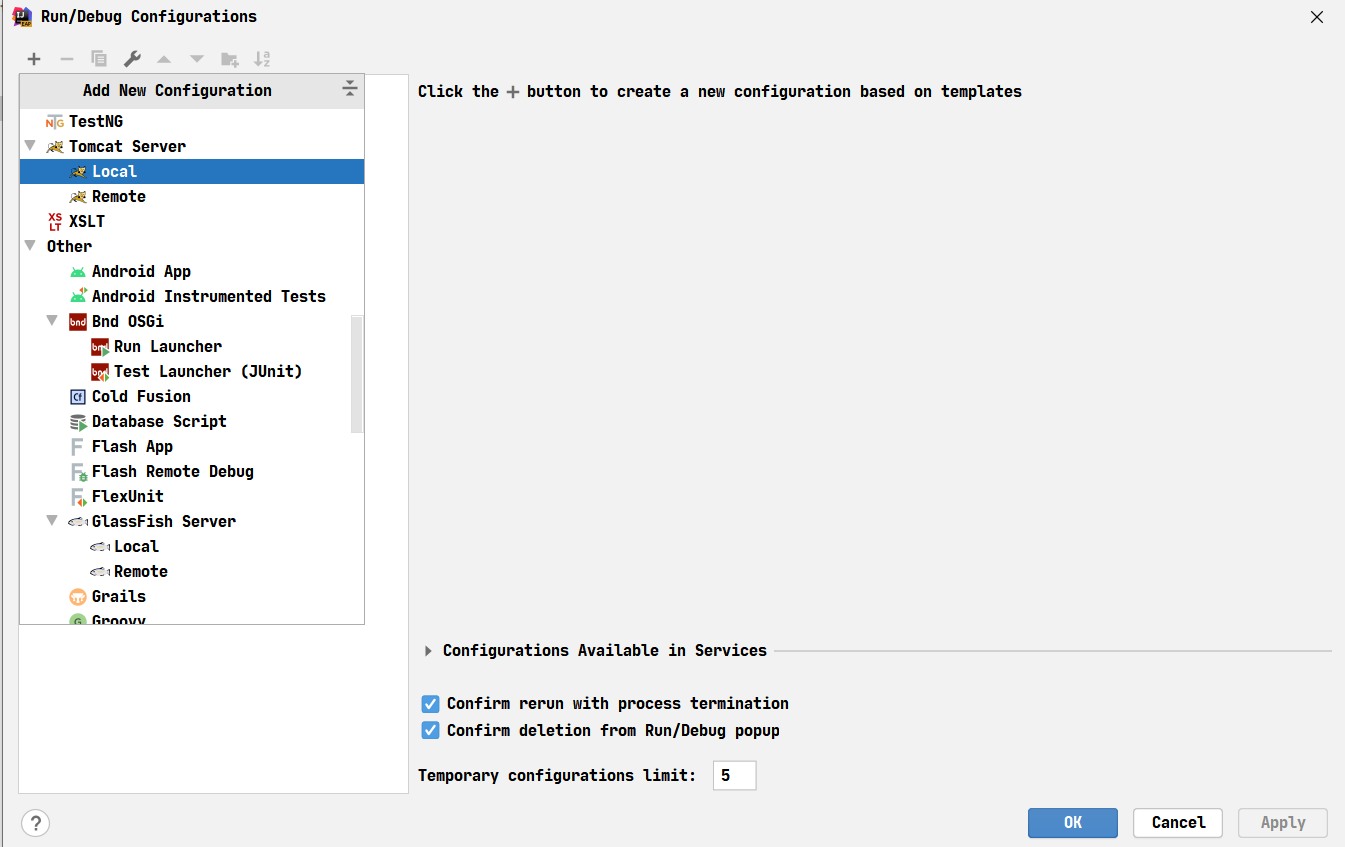
点击左上角的+号并选择(Tomcat Server, Local)来新建一个本地的部署配置
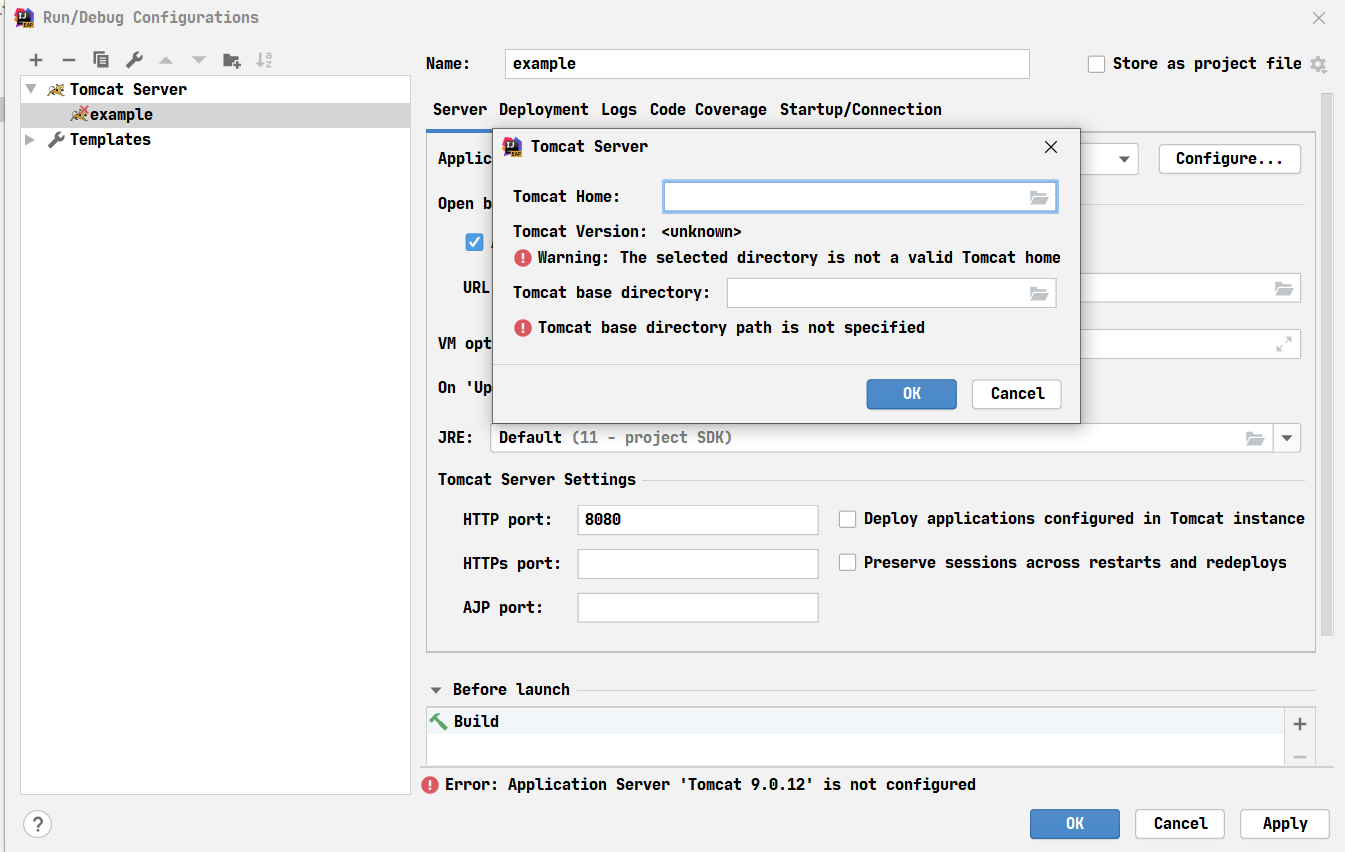
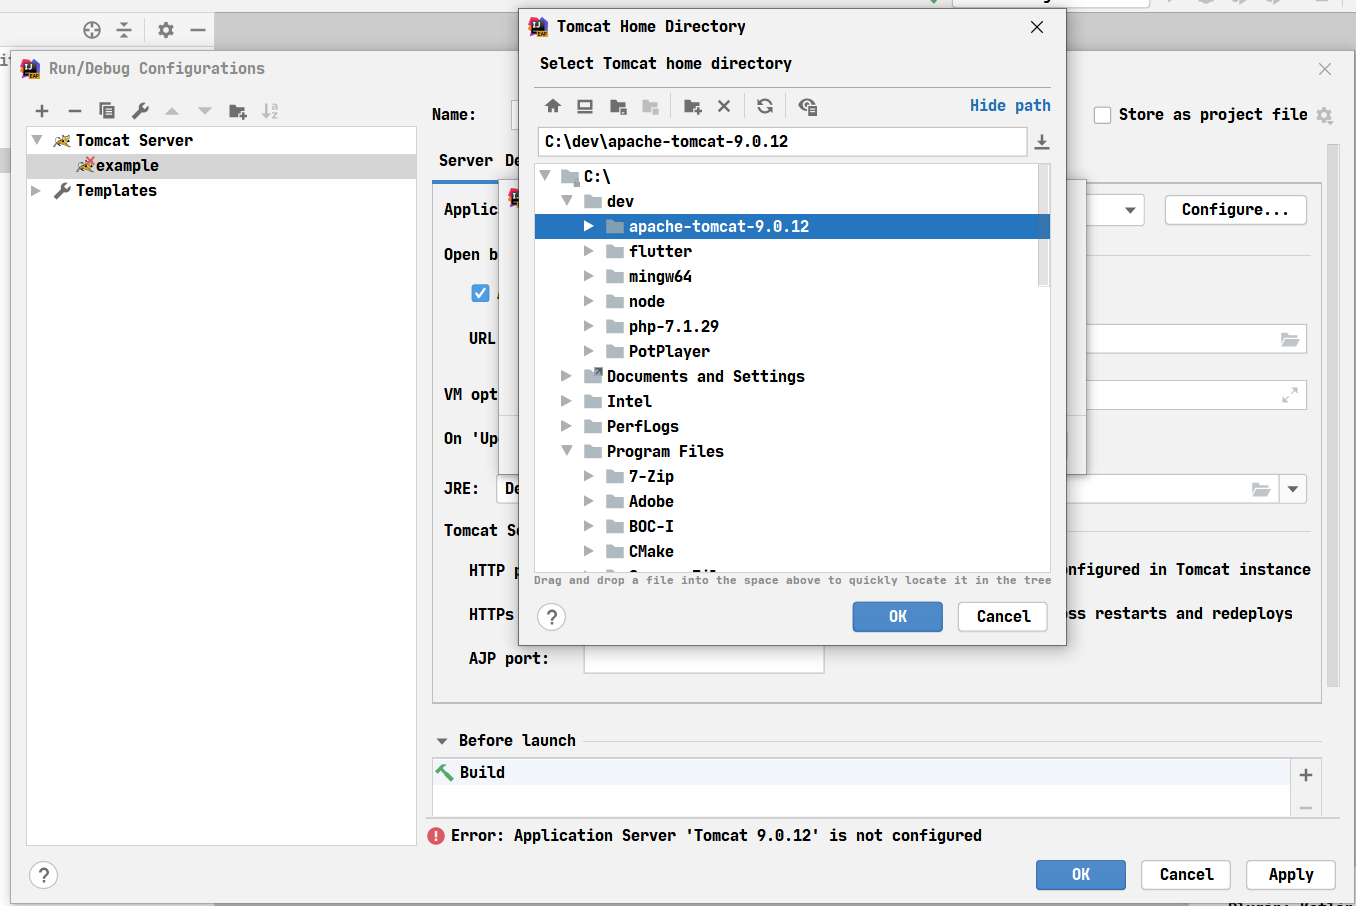
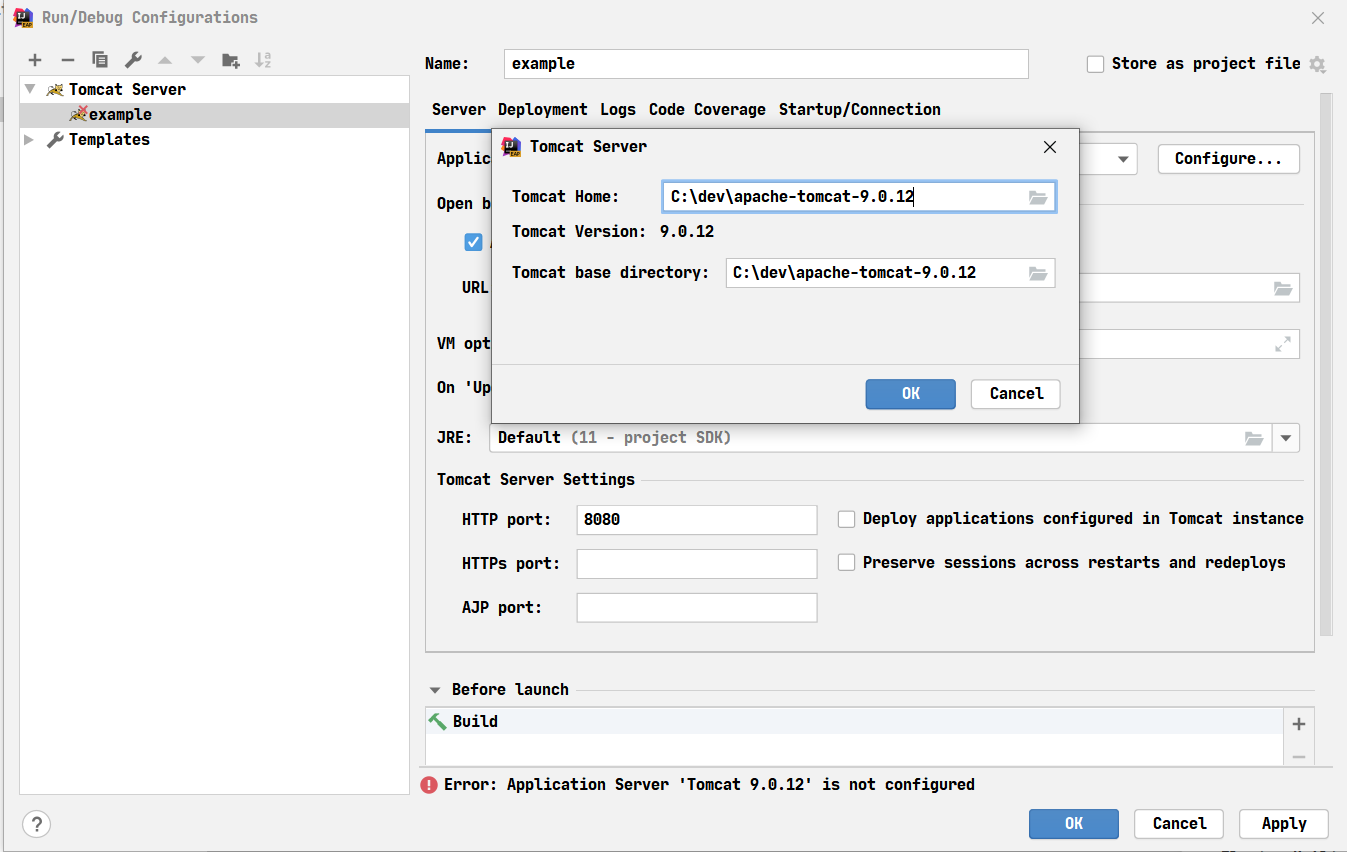
因为是第一次配置,我们需要配置Tomcat目录,点击Application Server的Configure新增一个Tomcat目录
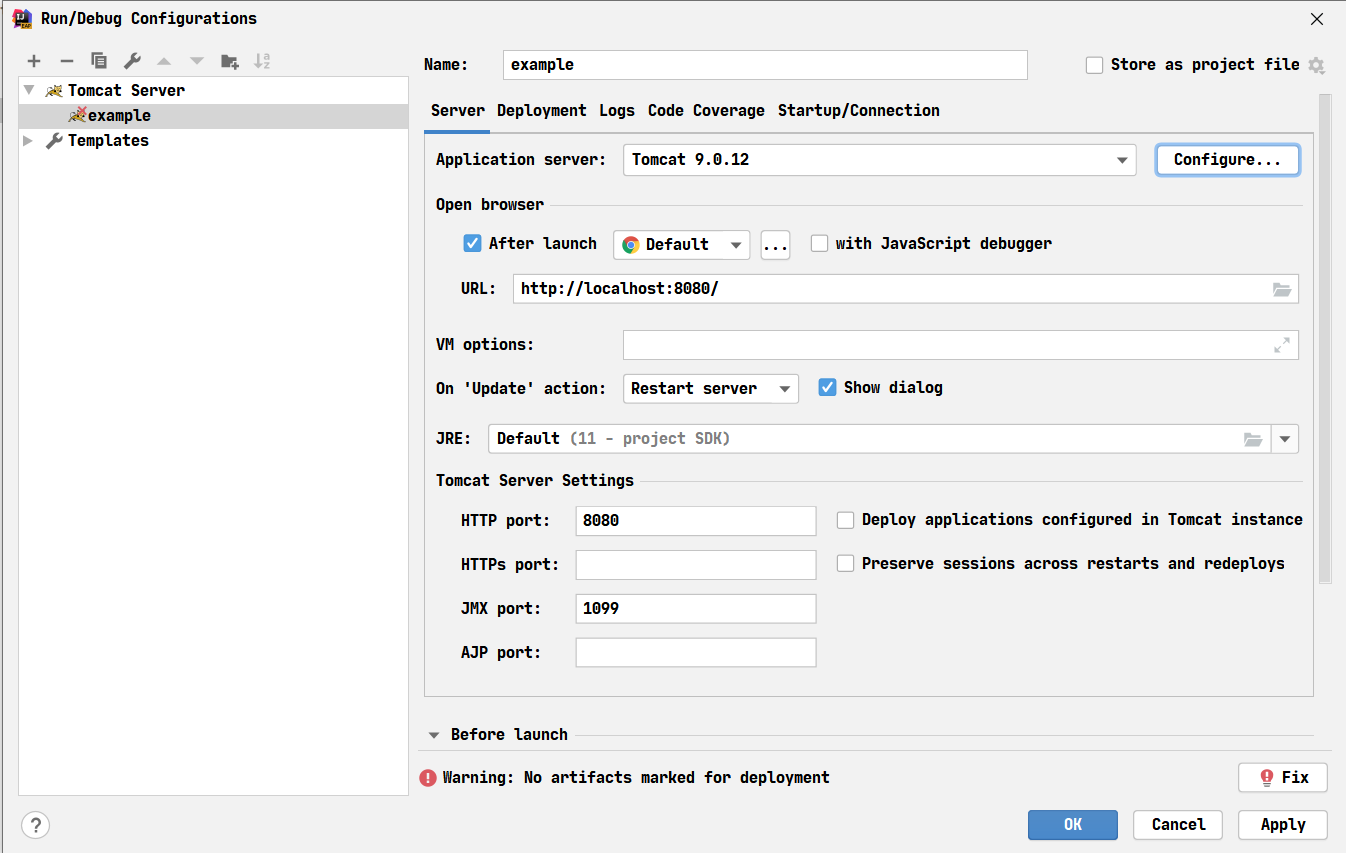
这里的URL是我们点击运行项目后IDEA自动打开浏览器URL,HTTP Port则是IDEA里的Tomcat需要监听的端口
点击右上角的绿色三角形可以运行应用,当看到下面的截图并跳出浏览器时,项目就运行成功了
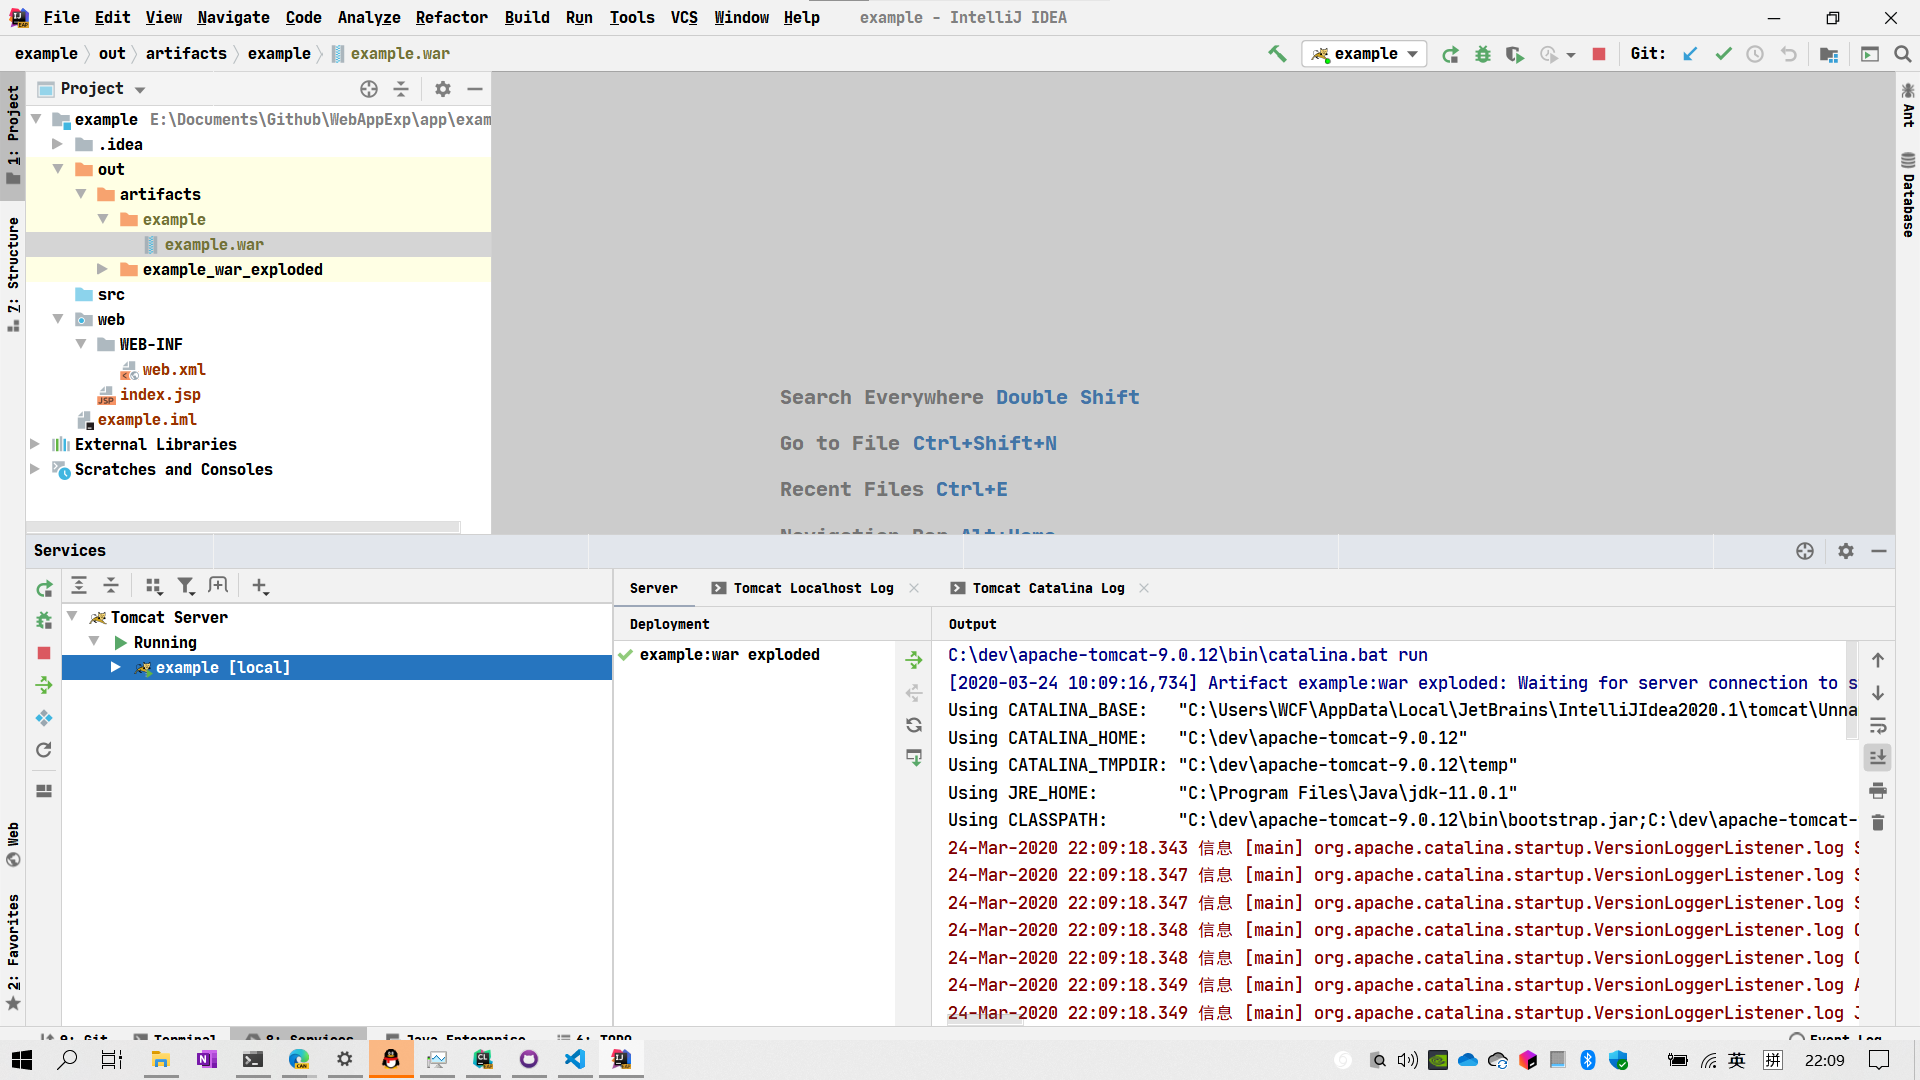
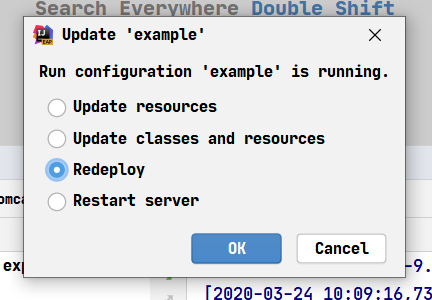
当代码有更改时,如果要更新正在运行的项目,你仍然可以点击那个按钮,只不过现在它是一个半圆形的刷新箭头,当跳出Update 'example'框时,可以选择Redeploy来最快的应用更改
接下来是配置要部署的内容了,进入Deployment点击右侧的+号,点击Artifact...就可以生成一个默认的未压缩的可用于部署的应用,Application Context是应用的路径,这里我们设置为example,所以到时候可以通过 http://localhost:8080/example/ 访问应用


接下来是打包应用的步骤
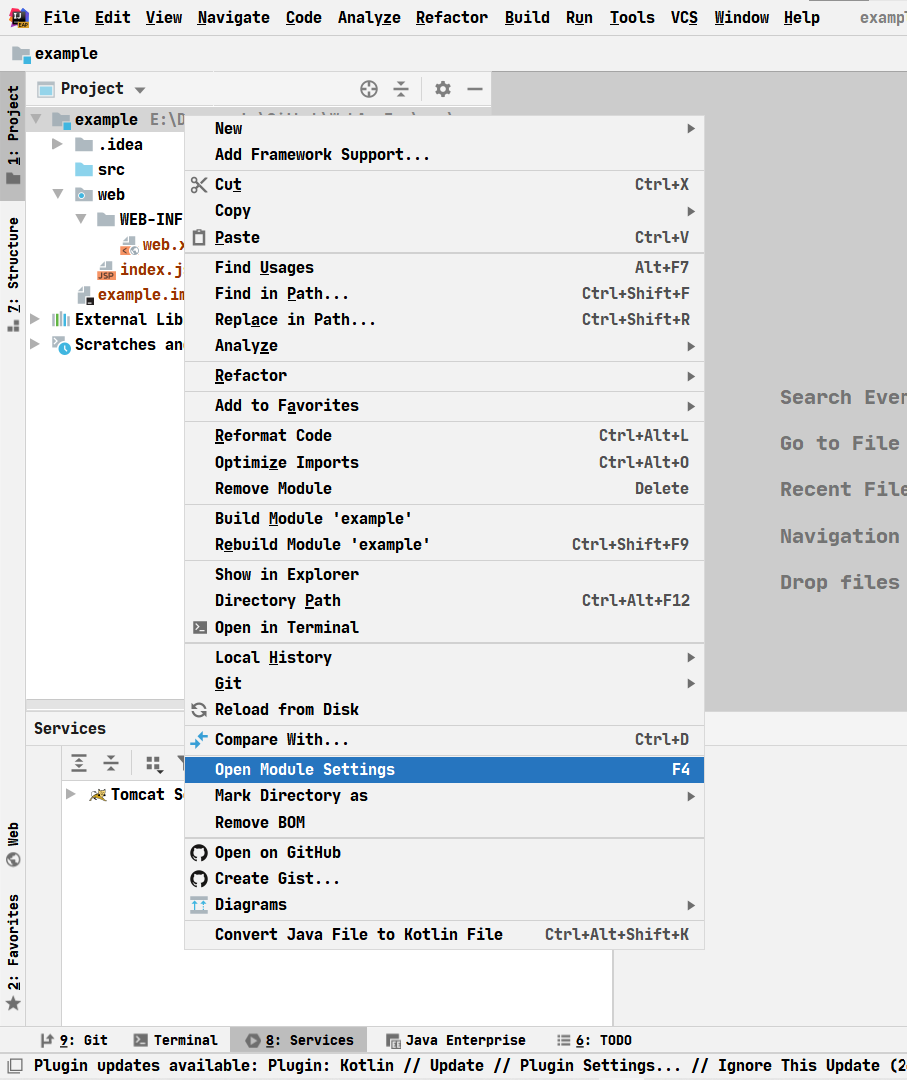
项目右键点击Open Module Settings
我们看到这里已经有了之前创建的exploded_war,现在我们要新建以这个exploded_war打包的配置,点击+号
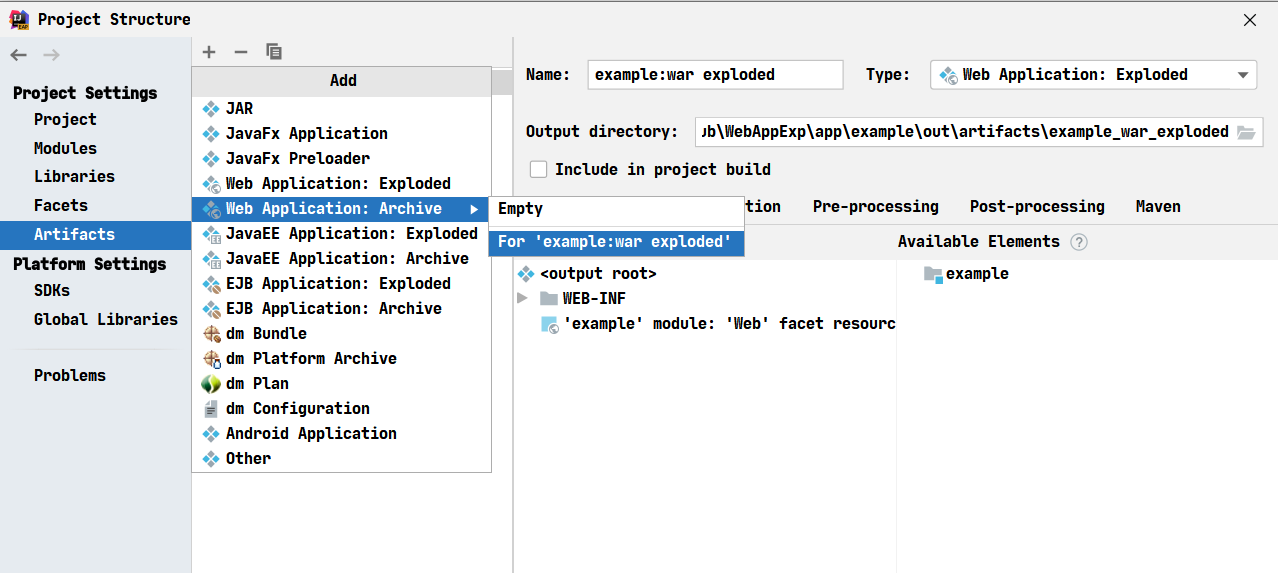
选择Web Application: Archive,For 'example:war exploded'就可以了,我们可以把Name改成example,这样生成的war文件的文件名就是example.war了

要编译新的应用是,只需要点击Build, Buile Artifacts...,点击Build或Rebuild就行了,example.war会出现在out文件夹中,把example.war文件放入Tomcat的webapps文件夹下,Tomcat默认会自动解压和部署,并且当文件夹下的example.war更新时,应用也会相应的更新


在微软的文档里,给出了一个在Linux上安装SQL Server的方法,在这里,我会取出其中一部分步骤进行讲解。
0.建议使用root用户进行后面的操作
sudo su
1. 导入公共存储库 GPG 密钥:
wget -qO- https://packages.microsoft.com/keys/microsoft.asc | sudo apt-key add -

2.为 SQL Server 2019 注册 Microsoft SQL Server Ubuntu 存储库:
add-apt-repository "$(wget -qO- https://packages.microsoft.com/config/ubuntu/16.04/mssql-server-2019.list)"
在这一步时,可能会缺少必备的依赖,可以使用下面的代码安装依赖
apt-get update && apt install software-properties-common

3.运行以下命令以安装 SQL Server:
apt-get update && apt-get install -y mssql-server
4.包安装完成后,运行 mssql-conf setup,按照提示设置 SA 密码并选择版本。
/opt/mssql/bin/mssql-conf setup
首先选择版本,选 2) Developer (free, no production use rights)
接下来询问是否同意协议,输入“yes”
接下来设置SA密码,要求密码强度足够高(包括大写,小写,数字,符号中的至少三种)
到这里,SQL Server就安装完成了
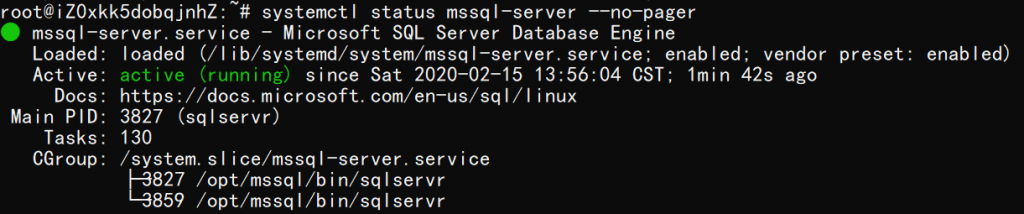
5.完成配置后,验证服务是否正在运行:
systemctl status mssql-server --no-pager
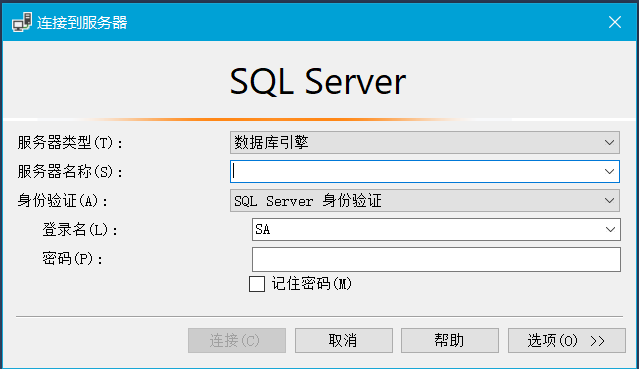
6.安装SSMS工具,连接到数据库
在Windows电脑上安装SSMS,可以去微软官方的下载链接,或者去我的云盘下载。
安装完成后,就可以使用SSMS连接到SQL Server
7.开始愉快的使用你的数据库吧!